Take a look across Latham Country! We’re coming to you every week.
Did you enjoy these videos? We want to (TECH)talk with you! Sign up for our newsletter to receive agronomy videos (and delicious recipes) in your inbox! We’ll TALK soon.
Take a look across Latham Country! We’re coming to you every week.
Did you enjoy these videos? We want to (TECH)talk with you! Sign up for our newsletter to receive agronomy videos (and delicious recipes) in your inbox! We’ll TALK soon.
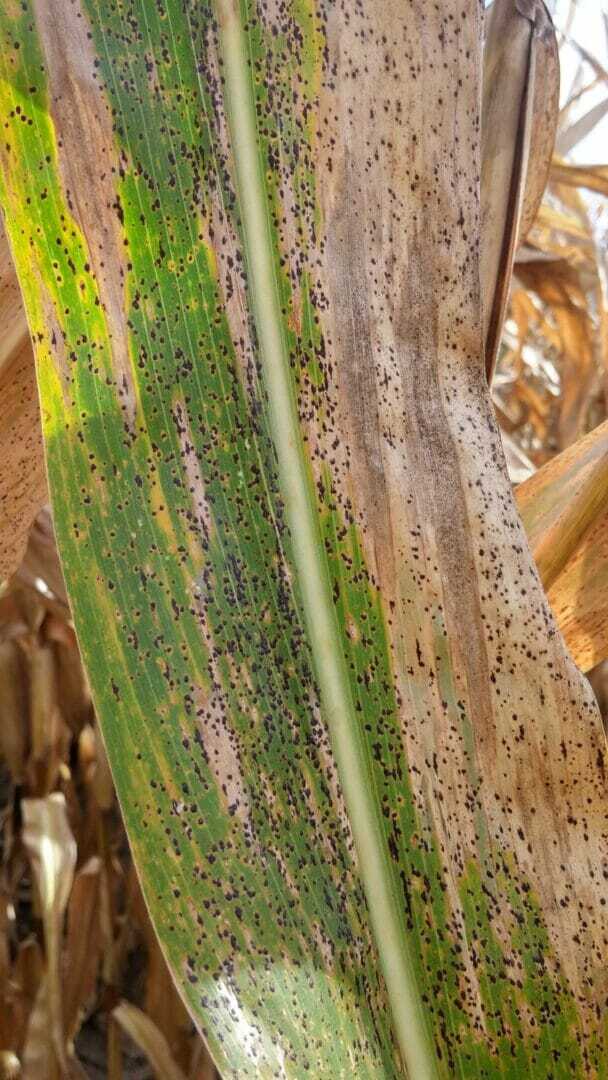
Identifying tar spot can be a challenge, especially in its early stages. The timing of its arrival, along with recent hot, wet and humid weather that promotes the diseases spread, can increase potential damage from tar spot.
Where to start:
Tar spot has a 14-day incubation period between infection and symptoms so it’s difficult to spot and know when to spray.
If you or a neighbor had tar spot in the past, scout and spray early with a systemic insecticide and keep scouting in case another application is required.
The best management practice is to select tar spot tolerant hybrids from Latham Hi‑Tech Hybrids. Contact your local RSM to see what hybrids are best in your area.
Did you enjoy this article? We want to (TECH)talk with you! Sign up for our newsletter to receive agronomy videos (and delicious recipes) in your inbox! We’ll TALK soon.
Many insects can pose a potential threat to seedlings and small crops during the early growing season.
“Early growing season” can be described as planting through the first week in June; however, in reality it has more to do with crop size or stage and degree days than an actual calendar date.
Insect injury can cause stand loss and loss of leaf tissue, both of which can contribute to yield loss. Because insects are small, mobile, and sometimes nocturnal feeders, it may be difficult to actually find the insect. Here are some tips:
Did you enjoy this article? We want to (TECH)talk with you! Sign up for our newsletter to receive agronomy videos (and delicious recipes) in your inbox! We’ll TALK soon.
Take a look across Latham Country! We’re coming to you every week.
How important is planting depth? Aaron shows us first-hand from the field in Central Iowa.

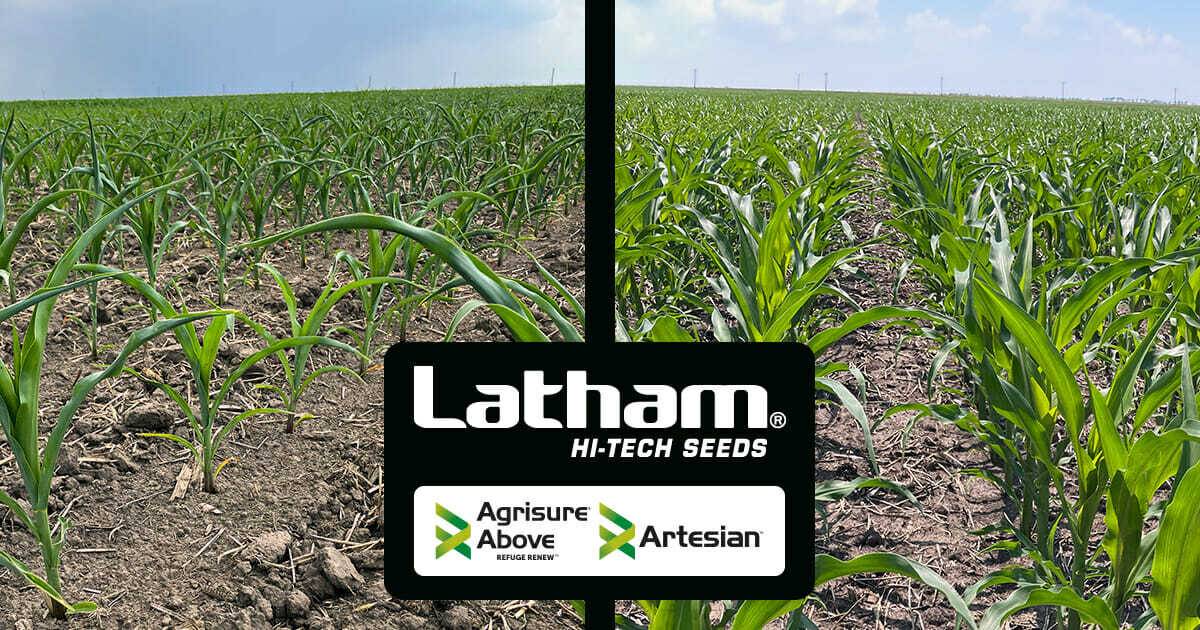
See the difference! On the left is LH 5034 AA after getting no rain for 35 days in super-hot weather. On the right shows the same hybrid after 1.2” of rain. This product has impressive heat and drought resistance in South Dakota! Learn more about our unmatched lineup: https://www.lathamseeds.com/products/?crop=377
Did you enjoy these videos? We want to (TECH)talk with you! Sign up for our newsletter to receive agronomy videos (and delicious recipes) in your inbox! We’ll TALK soon.
The first principle of crop scouting is to determine what is normal and what is not normal. Knowing what a healthy plant looks like is key to identifying seedling disease. When scouting for seedling diseases, look for yellowing, wilted, stunted, dead or missing plants.
Before you head out to the field, there are several tools that are must-haves for early-season crop scouting:
Remember that certain weather and soil conditions favor specific pathogens. Cool and wet soils favor Fusarium and Pythium, warm and wet soils favor Phytophthora, and warm and moist soils favor Rhizoctonia.
It should be noted that a lab diagnosis is needed to confirm what pathogen is causing the symptoms. Knowing what disease(s) are present can help you choose hybrids and varieties that have good disease scores in the future and can guide decisions on the use of fungicide treated seed.
Did you enjoy this article? We want to (TECH)talk with you! Sign up for our newsletter to receive agronomy videos (and delicious recipes) in your inbox! We’ll TALK soon.
Take a look across Latham Country! We’re coming to you every week.
Did you enjoy these videos? We want to (TECH)talk with you! Sign up for our newsletter to receive agronomy videos (and delicious recipes) in your inbox! We’ll TALK soon.

On this week’s Proof Points Podcast, Gary explains how seed treatment is an insurance policy to protect yield within a plant. Because we never know what Mother Nature will bring.

Take a look across Latham Country! We’re coming to you every week.
Did you enjoy these videos? We want to (TECH)talk with you! Sign up for our newsletter to receive agronomy videos (and delicious recipes) in your inbox! We’ll TALK soon.

Take a look across Latham Country! We’re coming to you every week.
Did you enjoy these videos? We want to (TECH)talk with you! Sign up for our newsletter to receive agronomy videos (and delicious recipes) in your inbox! We’ll TALK soon.
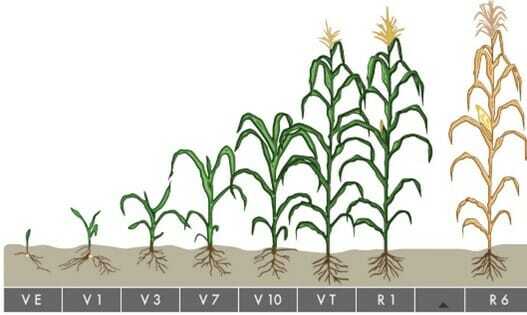
Planting across Latham Country has been progressing at a rapid pace and it will not be long before post-emergence spraying will begin. When to spray, what to spray, should I spray . . . these are some of the questions growers need to consider before heading to the field. I believe “when to spray” is one of the most critical decisions a grower will make. Damaging or injuring a young plant can have lasting affects that may not be visible to the naked eye. Understanding growth stages and relating this to the labeled requirements is a key to successful growing season. Let’s take a look at corn first.
Labels typically refer to growth stages for application timing and the chart below is a good reference.

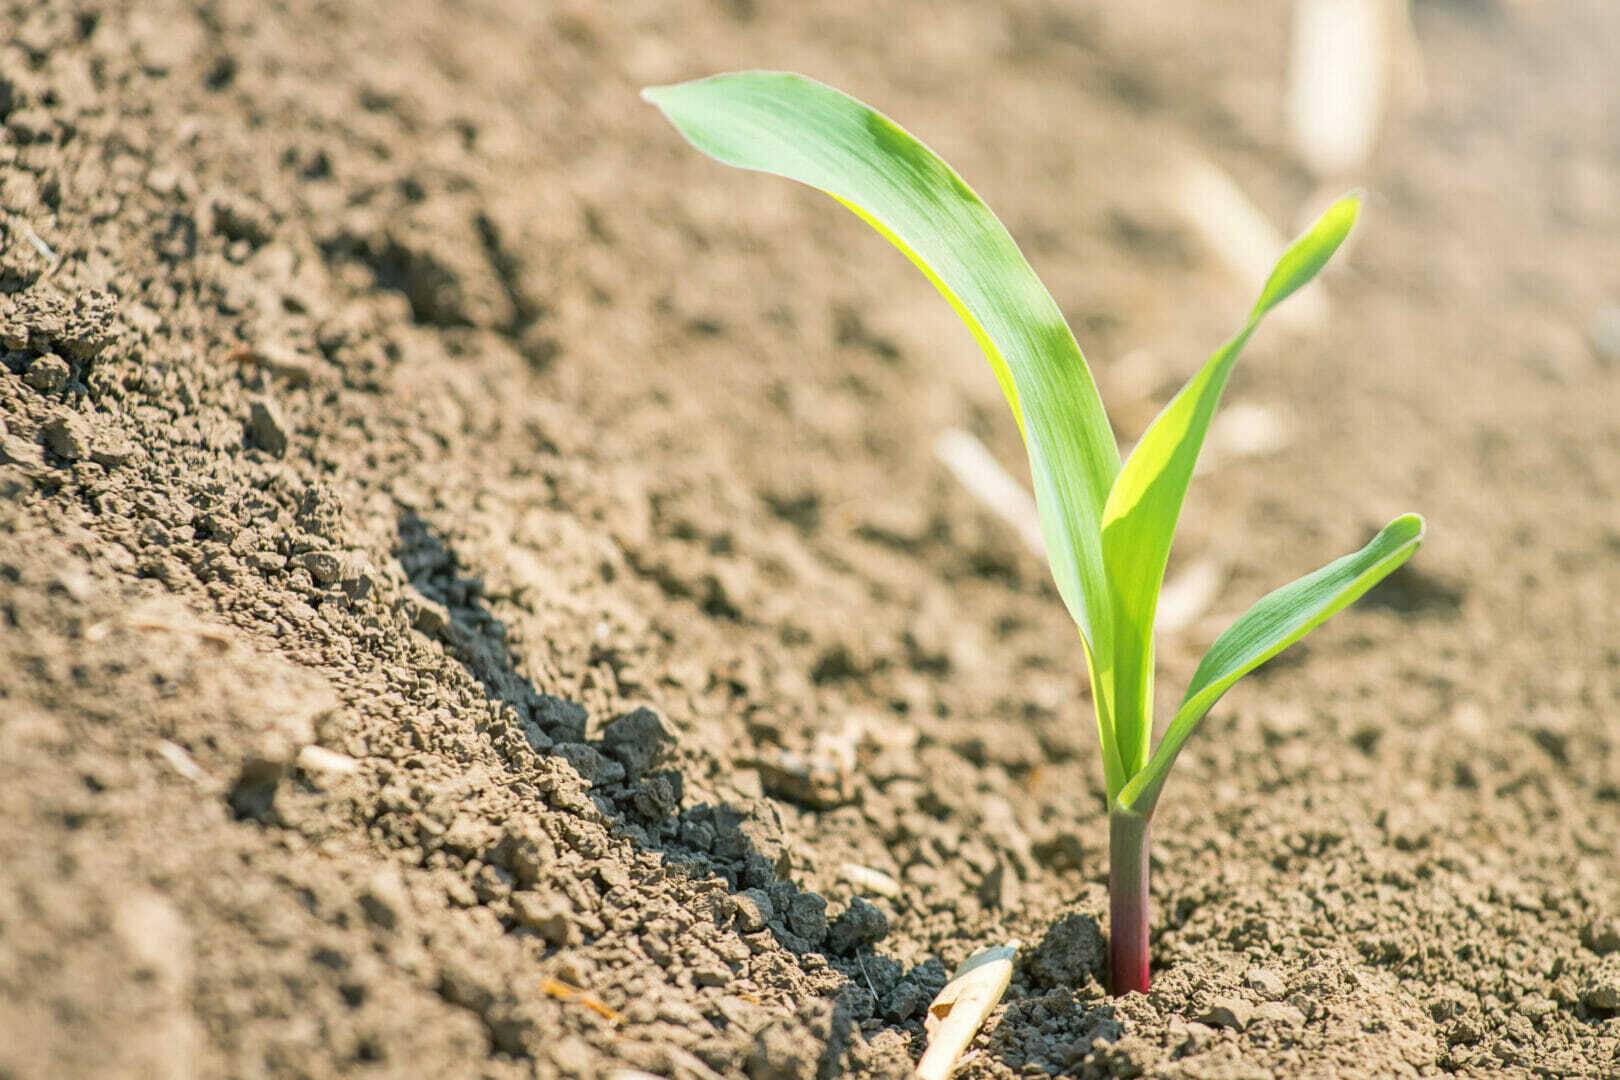
VE Stage – Corn emergence occurs when the coleoptiles reach and break through the soil surface. Normally, corn requires approximately 100-200 GDUs to emerge, which can be four to five days after planting. At this stage, growth is also taking place below the ground as the nodal root system begins to grow.
Emergence may occur as rapidly as four or five days after planting in warm moist soil, or may take three weeks or more in cool soils. A new leaf will appear about every three days during early growth, while later leaves developing during warmer conditions may appear in one to two days. Full season hybrids in the central Corn Belt typically can produce 21 to 22 leaves. Earlier maturing hybrids will produce fewer leaves.
Keep these numbers in mind as you plan out your season and prepare to spray your fields. Within a month after planting, a corn plant can go from the bag to V5-V7 if conditions are favorable.
Soybeans in a given field will not be in the same stage at the same time. When staging a field of soybeans, each V or R stage is defined when 50% or more of the plants in the field are in or beyond that stage. This makes it important to understand staging and development since not every plant in the field will be at the same stage when determining application timing. The chart below is a good reference for staging.
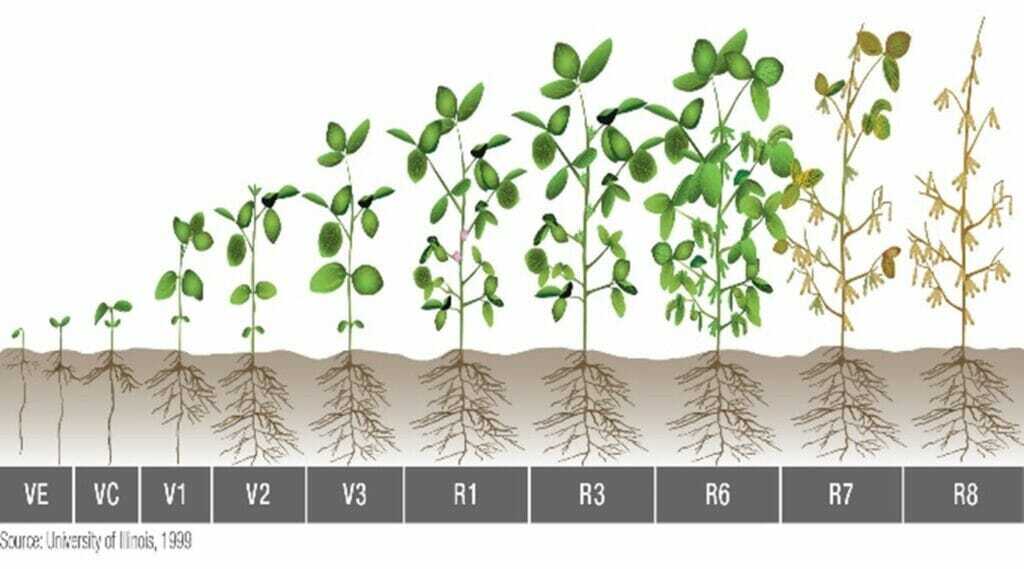
The general rule of thumb is to figure five days between growth stages in soybeans. The most important growth stage is R1 which is classified as one flower open at any node on the main stem. Soybean flowers are very sensitive and herbicide application should be avoided at this stage. R1 can begin before canopy closure and the temptation is there to make that final application before canopy closure. A good pre-plant program can help avoid the need for late season spraying and a few late escapes is not worth the consequences from spraying post-flower.
Did you enjoy this article? We want to (TECH)talk with you! Sign up for our newsletter to receive agronomy articles (and delicious recipes) in your inbox! We’ll TALK soon.