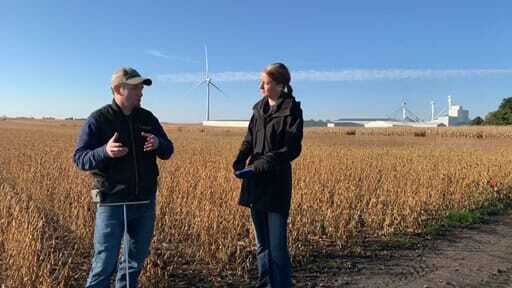
Benchmarking is the practice of measuring the financial health and performance of your farming operation by comparing it to your performance, and to similar farms. Benchmarking can allow you to improve your financial position by identifying specific actions that can lead to increased profitability and long-term success.
Both internal and external benchmarking require accurate and timely data. Organized data related to your income, expenditures, as well as inventories of assets and liabilities, allows you to easily make benchmark measurements. This is where precision agriculture can be a time-saving advantage for you.
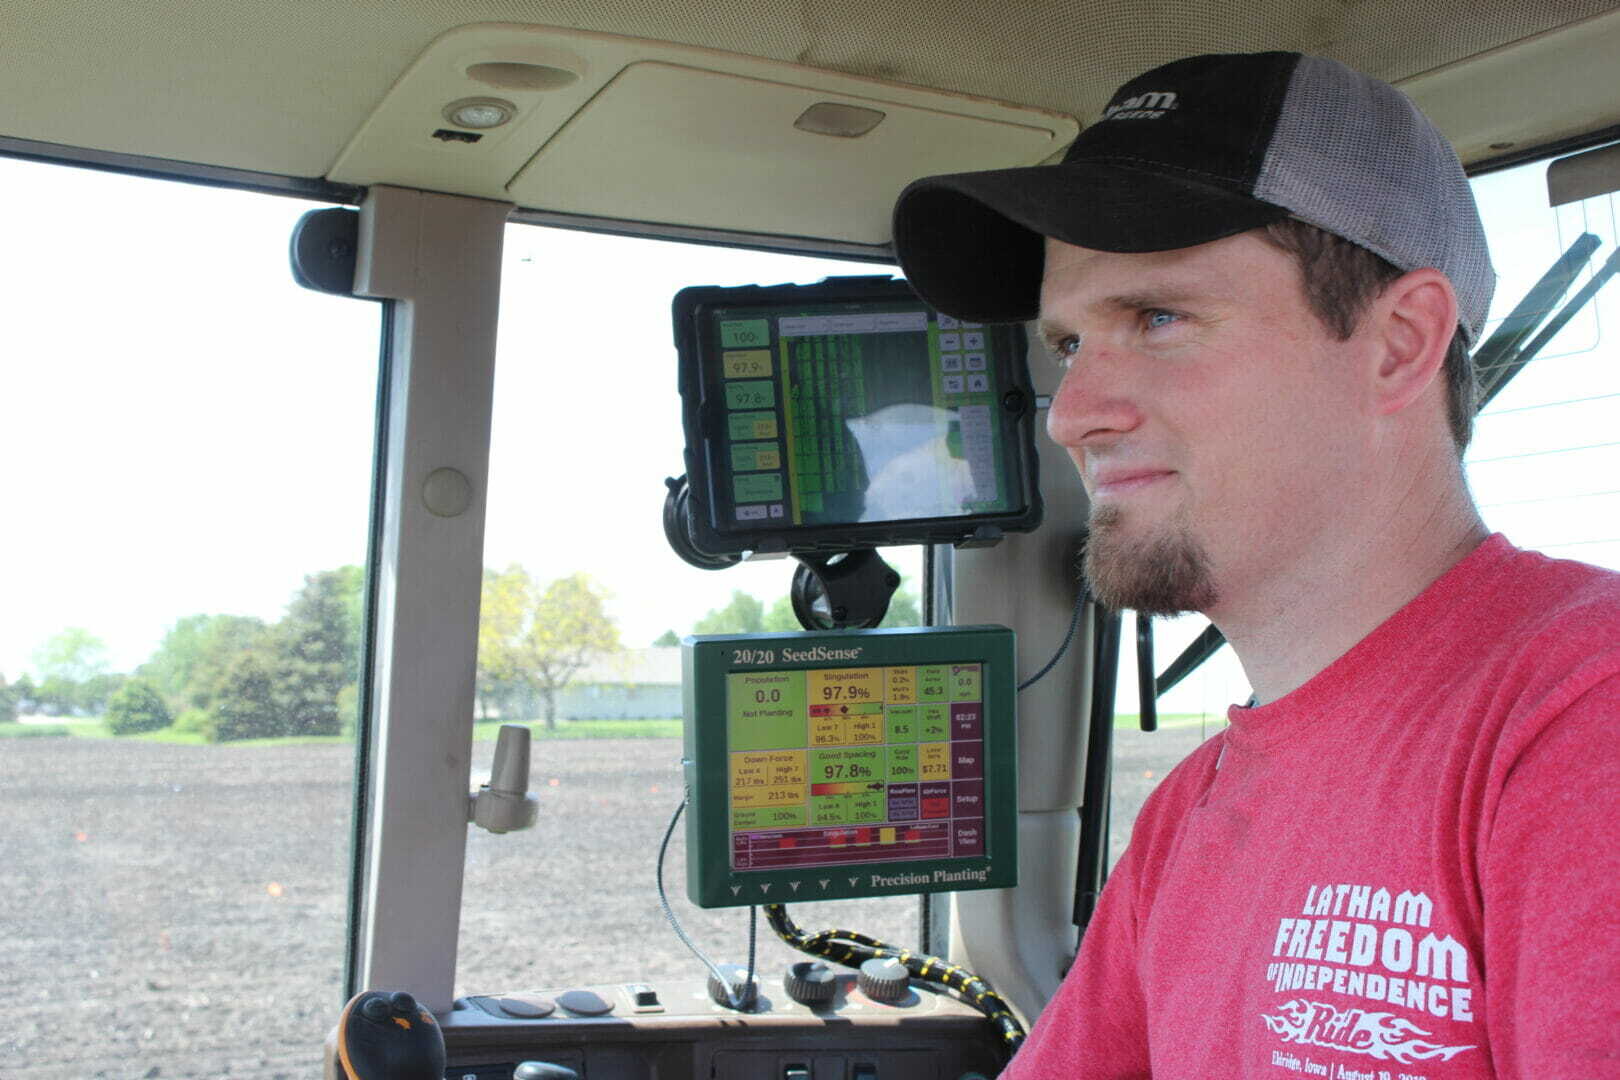
Precision agriculture tools can organize years and years of on-farm data to establish trends. Comparing your farm’s performance in 2019 to its performance in 2018 can help you understand the impact of changes in the market or changes you may have implemented internally.
Production benchmarks through Latham Hi‑Tech Seed’s Data ForwardSM program can help you start benchmarking years of information related to crop yields, seed and fertilizer use, as well as planting dates. Together, we can study the numbers. We can note where there are efficiencies, and develop a plan to increase efficiencies in other areas.
The next step is to compare your operation to similar farms in your area. For example, you might plant soybeans in 15-inch rows while someone else plants in 30-inch rows. By comparing your farm to others, you can gain knowledge and ideas. Group comparisons allow you to see the benchmarks of less profitable and more profitable farms, and all the information remains confidential.
Look again at the financial aspects of your operation after you have calculated production benchmarks. Are you reaching your targets? If not, what strategies and tactics do you want to try for 2020? Perhaps you want to try variable rate fertilizer. Maybe you’d like to reduce plant population in lesser productive areas of the field and increase it in higher fertility area. Through Latham’s Data Forward program, we can help you make changes with confidence.
While harvest results are fresh in your mind, plan for spring 2020. Now is a great time to schedule a Data Forward Needs Assessment, so we can help you achieve your goals.
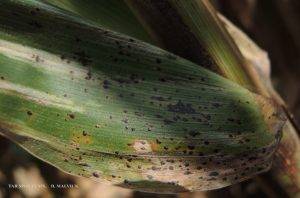
Tar Spot is a corn fungal disease that has been infiltrating the Midwest within the last few years. Tar spot has the capability to severely impact yields up to 30%. Concern about the intensity of this fungus grows as researchers learn more about it. We urge farmers to scout their fields through harvest for tar spot since this fungus can survive over winter year to year.
Tar Spot Identification
Tar spot will show up as small, raised blacks spots, on the upper and lower corn leaves. The raised black spots are also known as stromata. If severe enough, it can spread to leaf sheaths and husks. Typically, it will start lower in the canopy and move upward. Tar spots are usually accompanied with a yellow halo or fish-eye effect around the black spots. Note the stromata, cannot be rubbed off unlike a common or southern rust pustule.
The Importance of Scouting
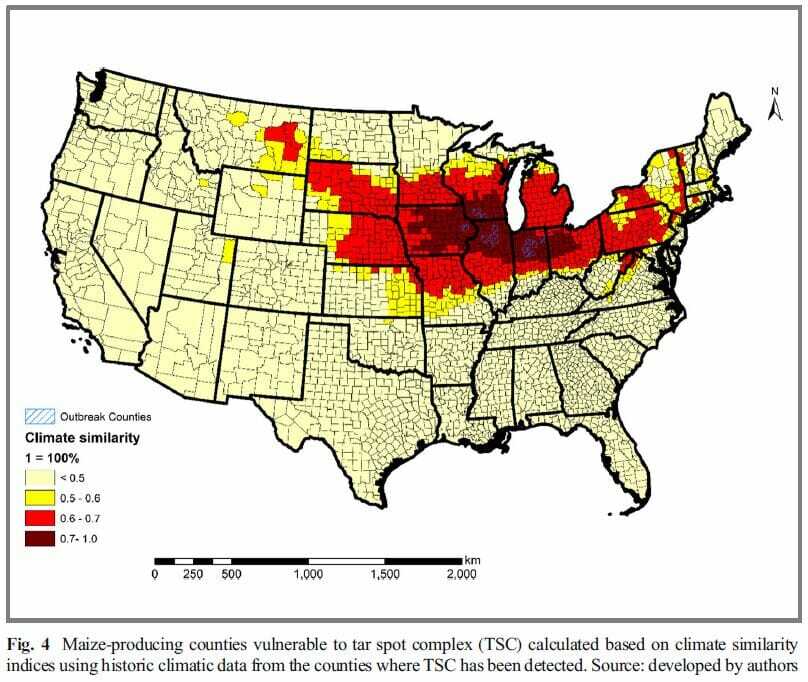
This corn fungus has nearly made it across Iowa and is continuing to spread in Wisconsin, Illinois, Indiana and Missouri. Tar Spot likes cool temperatures and humid conditions, with prolonged leaf wetness or heavy dew and will concentrate towards the middle of the field. It can cause lodging and hasten maturity.
Final Thoughts
This is one of the variables in farming we continue to learn about. Scout now and start planning for next season. Product selection is key when fighting these variables year to year and important to integrate into your plan for the next growing season.
“Threats of Tar Spot Complex disease of maize in the United States of America and its global consequences” (Mottaleb et al. 2018).
Could Tar Spot be the next Gray Leaf Spot? Tune in for our #AskTheAgronmist discussion!!
0:25 Crop report update
1:21 Tar spot topic introduction
2:10 Identification of tar spot
3:25 Favorable tar spot conditions
5:05 Where to find tar spot in your fields
6:25 The spread of tar spot
9:35 How does tar spot survive through winter
10:45 Take home points on tar spot
Pictured above are vulnerable areas in the Midwest for Tar Spot. “Threats of Tar Spot Complex disease of maize in the United States of America and its global consequences” (Mottaleb et al. 2018).
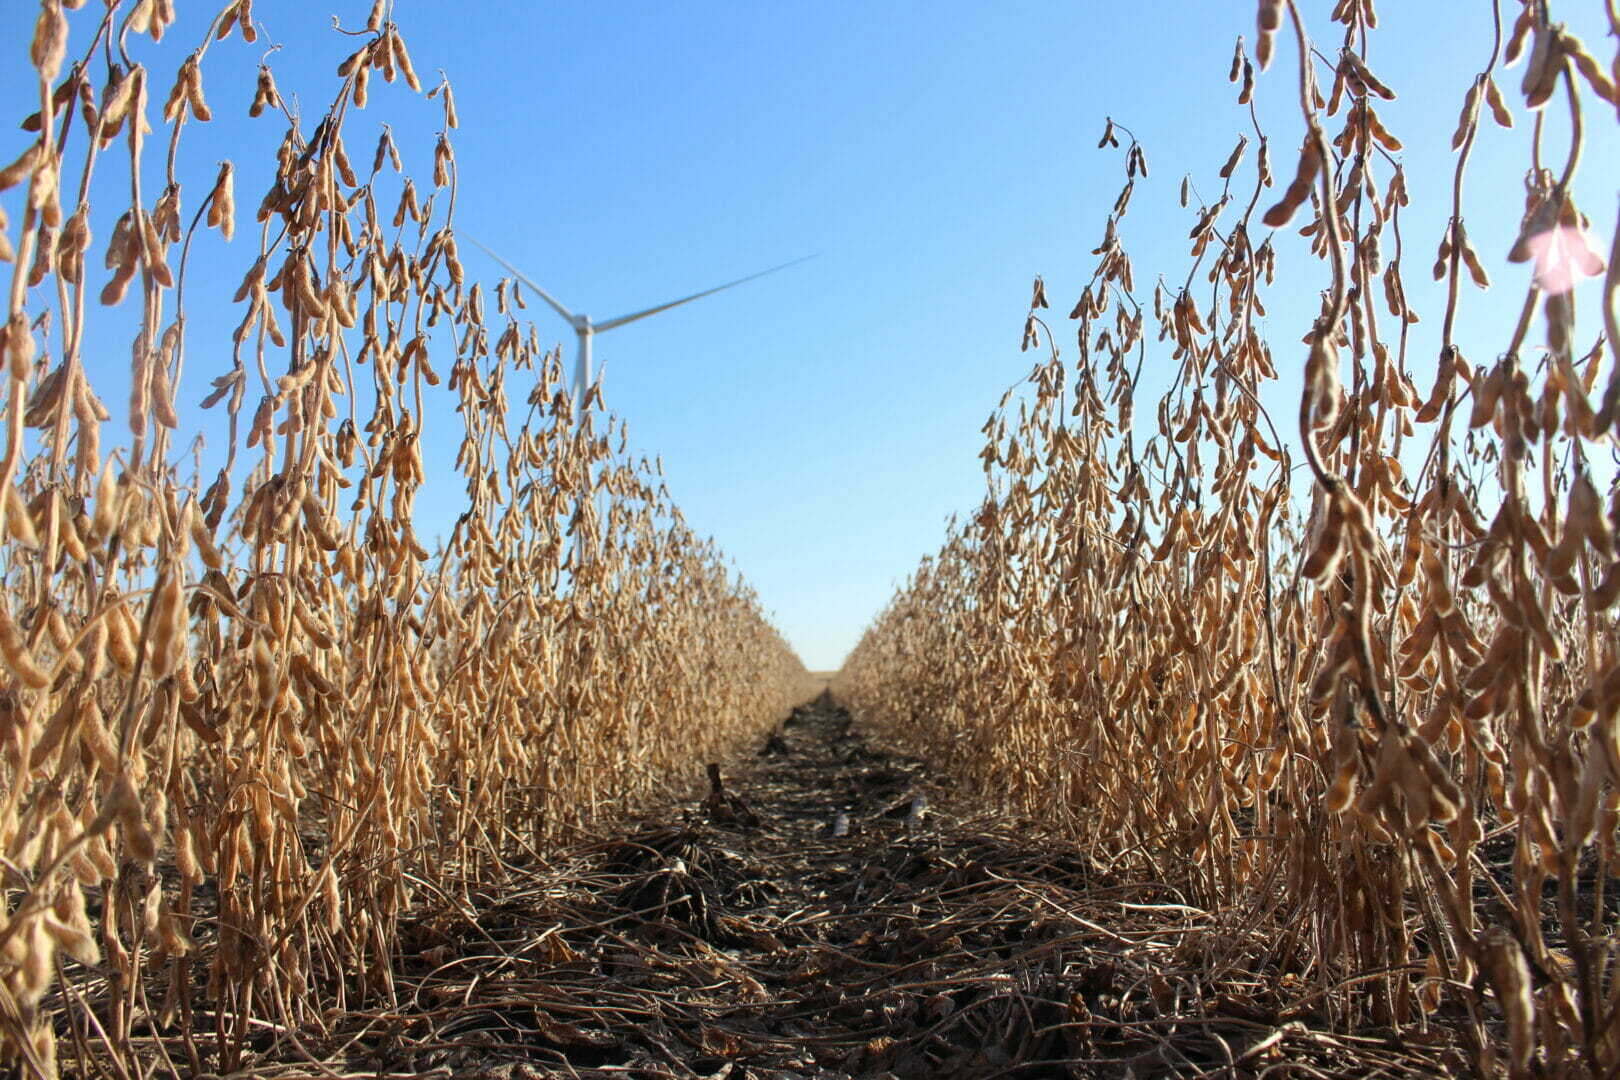
One comment I often hear from farmers is “I just can’t seem to get an increase in soybean yields as I do for my corn yields.” This is the perfect time of year to reflect on the growing season while analyzing yield results. It’s also the best time to sample for soybean cyst nematodes.
What is SCN?
Soybean cyst nematode is a microscopic ground worm. When analyzing soybean roots, it’s important to correctly identify the difference between nitrogen-fixing nodules and cysts. Nodules for nitrogen production are larger and the size of a pea. Cysts are microscopic and smaller than a grain of sand.
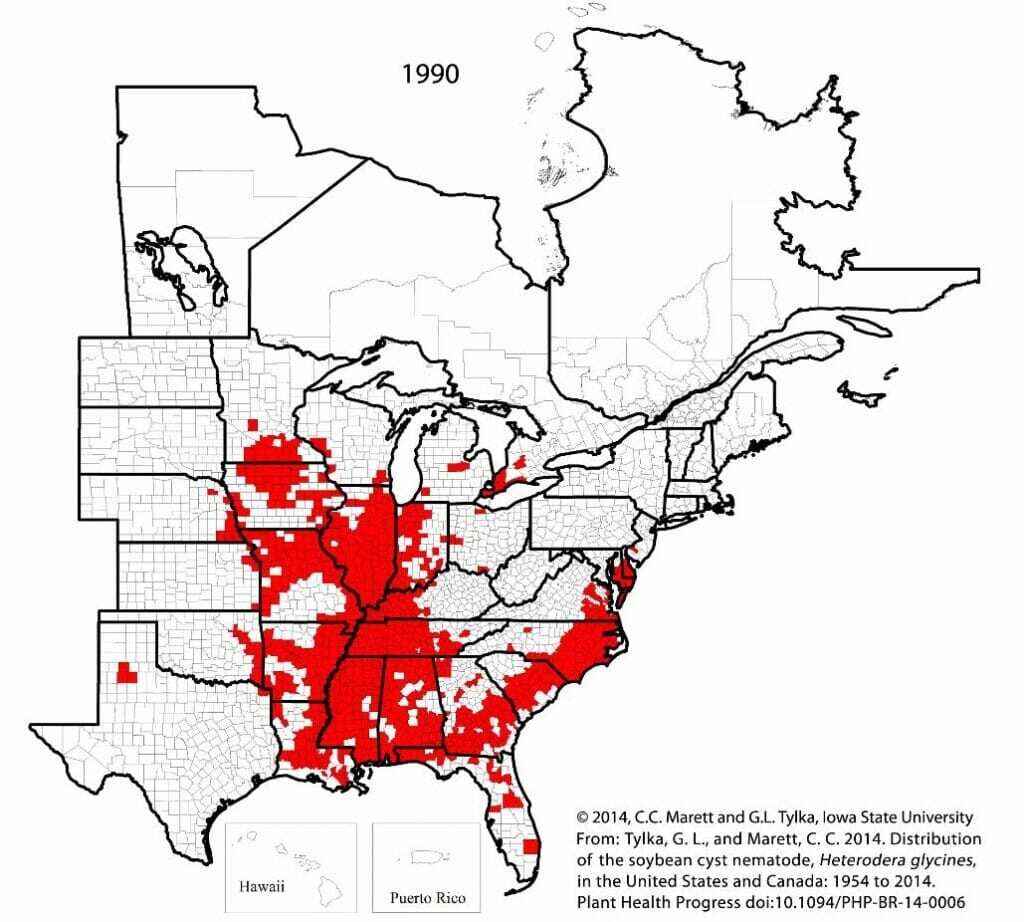
One of the biggest challenges when identifying SCN is that it is not accompanied with many symptoms, but can cause up to a 30% yield loss. Usually SCN shows up in hot spots, where you can see severe stunting, yellowing, shorter crop, lack of canopy or early maturity. These symptoms tend to show up on lighter soil or during tough growing seasons. Wherever soybeans are grown, typically SCN is an issue. Below are two maps to show the growth of SCN over the years.
What is the life cycle of SCN?
Essentially the cyst is the life cycle of a nematode. Juvenile nematodes come in and infect the root. Typically, just the females feed on the root which takes away nutrients from the plants results in a loss of yield. They will then mate and produce eggs. When they produce eggs, they expand in the root, erupt and spread 20 to 500 eggs throughout the soil. The cysts then harden on the root and the process begins again.
In Iowa, we can see that happen for at least three generations per season. Each cyst can have between 20 and 500 eggs inside, creating opportunity for juveniles to come back and begin feeding on the soybean root.
Once the eggs get in the soil, it’s important to understand the number that you have in the soil. Those eggs can stay dormant year-over-year in the soil. Since these eggs are so small, they require very little oxygen to survive.
Management of SCN
The most important management practice of SCN is IPM – Integrated Pest Management. In the Midwest, having a corn and soybean rotation is a great start. Corn is not a host crop whereas soybeans are. I also suggest soil sampling this fall to identify the egg population in your soil. Pull a core from about 8 inches down, right next to the soybean plant right in the root zone.
I also advise to stay away from sampling in the middle of a hot spot for SCN. Often the eggs are concentrated along the edge of the hot spot, so sampling that area will give most accurate results. Population thresholds vary by state. I suggest looking closely to your management practices if results are anywhere from 2,000 – 5,000 eggs per sample. Once you know what is in your field, you can begin to manage it.
Here are three ways to help manage this pest:
Plant Latham® brand resistant soybeans. Reference product characteristics on our website to identify the disease rating
Use Latham SoyShield Plus® with Saltro® seed treatment. This will fight SCN and Sudden Death Sydrome.
TALC USA. Protect corn and soybeans against parasitic nematodes.
Feel free to call into the Latham Seeds office or email me at phill@lathamseeds.com with any questions.
Post-Harvest Soil Tests Can Yield Results Next Season
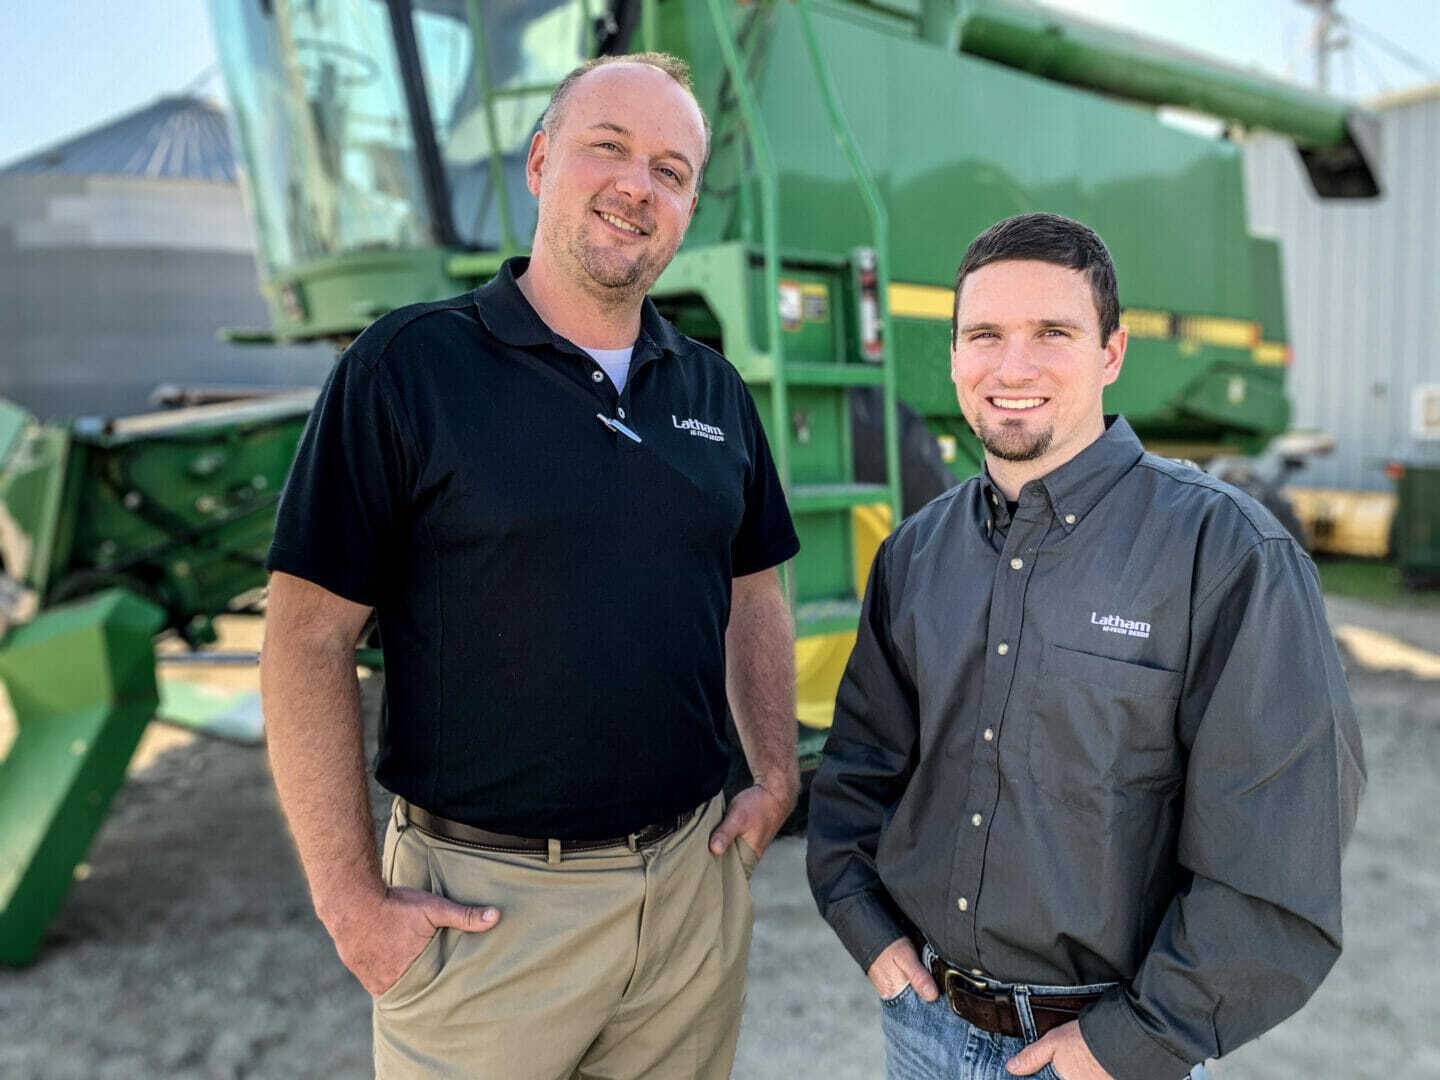
by Darin Chapman, Precision Agronomy Advisor
Soil sampling and soil testing are best management practices to produce the highest yields. As margins narrow, farmers often look to reduce fertilizer as a way to reduce costs of producing a crop. Soil tests and precision ag technology can be the catalyst for reducing costs of fertilizer inputs without sacrificing yield or soil health.
The basic principles of soil sampling haven’t changed much over the years. Advancements in cropping practices, machinery and technology, new crop genetics and fertilizer application have resulted in advanced strategies for using that data.
Fertilizer recommendations historically have been based on average soil tests, area conditions and target yields. This method is good for the acres that align with the average, but it also means too little or too much fertilizer is applied to other areas impacting yield and profitability. It’s good practice to take soil samples every three years to monitor phosphorus and potassium. Soil sampling for nitrogen is imperative, particularly in years with unusual weather.
If reducing fertilizer costs is the goal, here are a few steps to consider:
Reduce broadcast applications in areas where soil tests show optimal levels. Routine soil tests in the years following with help make sure those nutrients are remaining at optimal level with this new practice.
Use Latham Hi‑Tech Seeds’ Data Forward™ App to make grids that fit your operation whether it be 2.5-acre grids or zone sampling. Try to avoid these sampling areas: lime, sludge, or manure piles, animal droppings, areas near fences or roads, banded fertilizer rows, eroded knolls and low spots to ensure good data is included in your results.
Sample fields at the same time every year, so your analyses are more comparable over time. Post-harvest is a good time to sample for many crops. Taking samples three to six months prior to the next crop will allow enough time for any pH or nutrient adjustments.
Establish a dollar amount to spend on potassium, phosphorous, lime and nitrogen. Review the soil test grids to identify low producing areas and high producing areas of your fields. These newly identified zones can be a map for where to place more or less fertilizer for best return.
Low fertility and PH levels play a huge factor in your crop yields. We need to take advantage of the current technology to make crucial decisions on variable rate applications across the field. If we are not using our soil test results, yield monitors and yield maps to their full ability we are missing big opportunities to increase income.
Contact Latham Seed’s Precision Agronomy Advisors to perform a Needs Assessment. Phil Long and I can help you decide what is the best fit for your operations.
Reap More Than Grain: Tips for Gathering Harvest Data
Precision agriculture is all about more accurately understanding each field you farm. The yield monitor can help you increase profit by calculating ROI from different management practices.
Calibrate. Calibrate. Calibrate! The importance of calibrating combine monitors can’t be stressed enough. For those who run a yield monitor, that screen can take your operation to the next level. Accurate yield data can be compared from year to year and across different crops to establish areas within each field that must be treated/managed differently.
Yield maps may be used to create zones for applying fertilizer, lime, seed, nitrogen and many other inputs. It’s important to place inputs in the right spots to provide the best return per acre. Even if you’re not implementing variable rate technologies today, you might someday. That’s why it’s so important to calibrate more than once and always when switching crops.
Our goal with DataForward® is to place the best hybrid or variety on each field based on the information available. Seed selection can add 40 bushels per acre (bu/A) on corn and 15 bu/A on soybeans! Placing the best genetics for a given environment pays.
Evaluate those products on your farm. How are they standing? How are they coming into the combine? What is the moisture? How is late-season crop health where you sprayed fungicide? What is plant stature? Ear height? Take notes on how each hybrid physically responds to your field environment. Each field has a different overall environment from fertility and soils to disease pressures and climate conditions.
Another advantageous feature of precision ag equipment is dropping pins and taking notes. If you’re noticing more tip back on your corn, drop a pin and make a note or drop a pin and take a picture using your phone. Perhaps the plant population was a little too high or maybe too much nitrogen was lost in that area, or maybe the problem stems from a deeper fertility issue that only a diagnostic soil sample can find. Grid sampling may be too coarse to catch a particular spot, but using precision ag tools allows you to plot what you’re seeing. Then you can go back later, when you have more time, and evaluate the data. When harvest ends, planning for the next crop begins.
Keep diagnosing problem areas after the combine has been put away. Turn Precision Ag tools into profit! Feel free to contact me at the Latham office if I may be of assistance.
Many Latham sales managers, dealers and customers have shared their concerns about the excessive rainfall received. Most of Latham Country in the last few weeks have been wetter than normal.
Wet weather brings to mind diseases, and too often we see corn fields with some leaf and stalk quality issues late in the season. I’ve personally seen a lot of Common Rust, Northern Corn Leaf Blight, Gray Leaf Spot and Eyespot this year.
Even with harvest underway, it’s important to continue checking fields and assessing stalk integrity as weather conditions can cause crop conditions to change. Ideally, farmers harvest the driest fields first so crops can dry naturally. This obviously saves time and money, but those plans must be revised if stalk rot shows up.
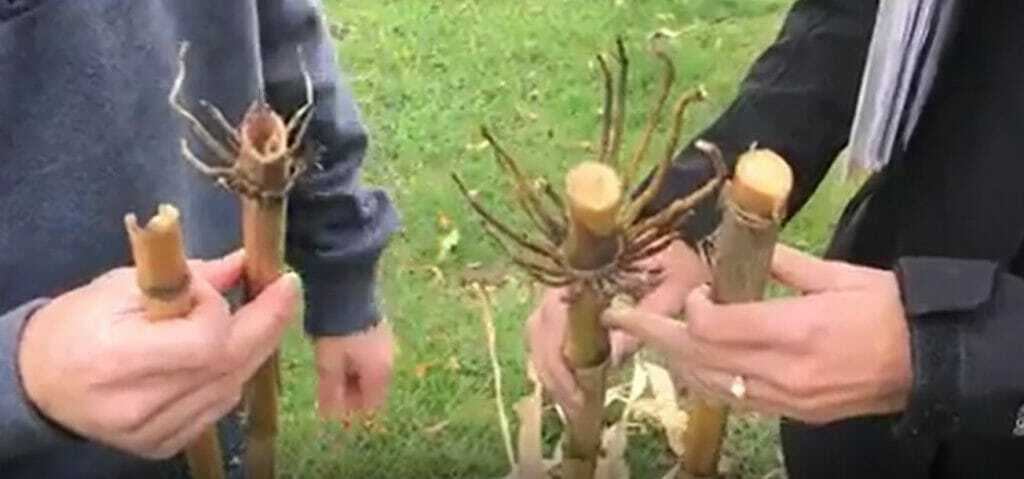
There are two primary ways to check corn plants for stalk rot: (1) Pinch the stalk at the base of the plant, usually below the first and second nodes. If the stalk pinches easily between your fingers, stalk rot is likely. (2) Take the entire stalk and bend it to a 45-degree angle. If stalk rot is present, the plant usually breaks at the lower part. Do this with at least 10 plants from different areas of your field to provide a good sampling. If stalk rot is present, harvest that field as quickly as possible regardless of the moisture content. The yield that could potentially be lost during high winds or complete rot will far outweigh the extra cost of drying grain.
Weather will, of course, dictate how corn stalks hold up to disease and normal decay. Adjust your harvest plan if needed to harvest the worst first.
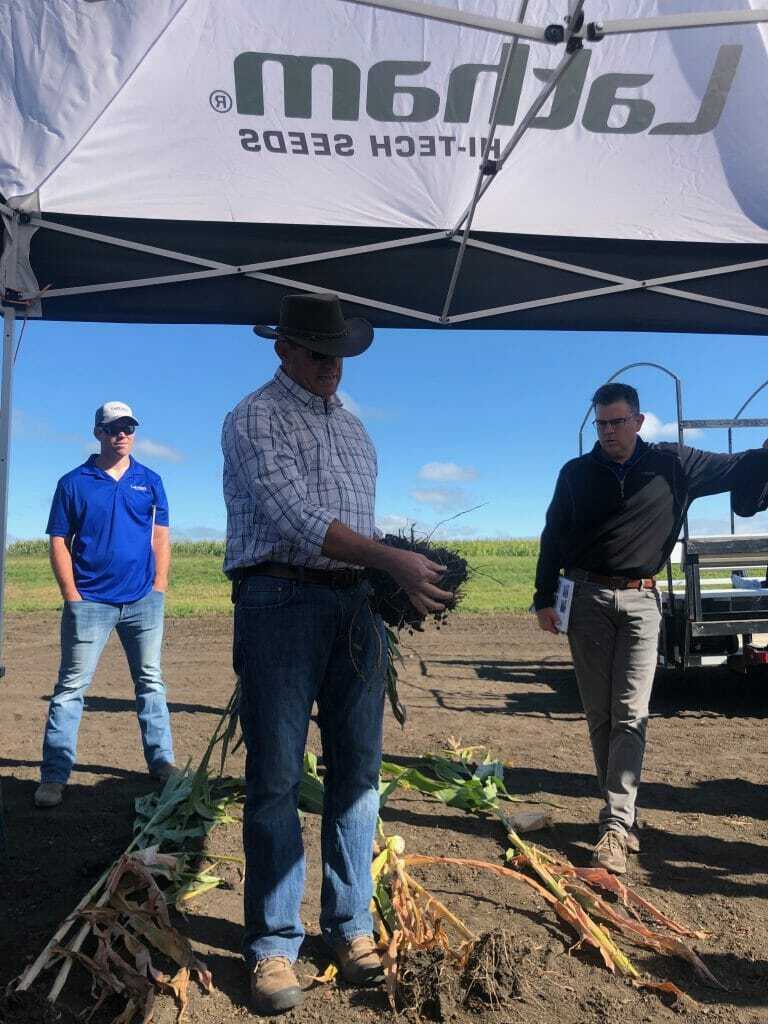
This fall will go down in history as one of the most anticipated harvest seasons ever. Never have we experienced such widely varied circumstances. It doesn’t seem to matter if we are discussing conditions regionally, state to state, farm to farm, or as we have seen way too much of this year, plant to plant.
Walk into almost any field in Latham Country and you’ll notice the variability in studying just one row. The huge difference in ear sizes, plant maturity, and ear-to-ear kernel maturity with a 50-foot circle of plants seems to be widening. Overall, it is apparent that the extremes of the 2019 planting season seem to be widening. There are yellowing patches that we didn’t notice in July or random bunches of plants simply folding up but surrounded by much better plants. While driving down the road and looking in through the lower canopy, suddenly we can see six rows in because the bottom canopy is disintegrating in a matter of a few days.
We might say these things goes back to the spring weather, and for the most part, we would be correct – partially. Depending on where you farm, the conditions we’re seeing now probably stretch back to last fall before most of the harvest took place. Remember when that beautiful crop was 26 to 28% and many of us held off for drier corn before harvesting? Remember the 3+ weeks of rainfall across most of Latham Country?
Much of what we faced this spring, as well as what is occurring in our fields now, started last fall during field activities. Compaction resulted when combines, carts, trucks, spreaders and tractors rolled across wet fields. This spring just added to it. We were beyond wet, so we invented ways to cut corners to plant when the window opened. How many of us know of a field where the headlands pollinated 3 weeks before most of the field?
In 2019, 51% of the U.S. corn crop was planted after May 25. Much of this acreage was planted because time was simply running out. For the most part, we experienced a gentle July and August, which probably has given many of us alarm as we see parts of this crop folding up.
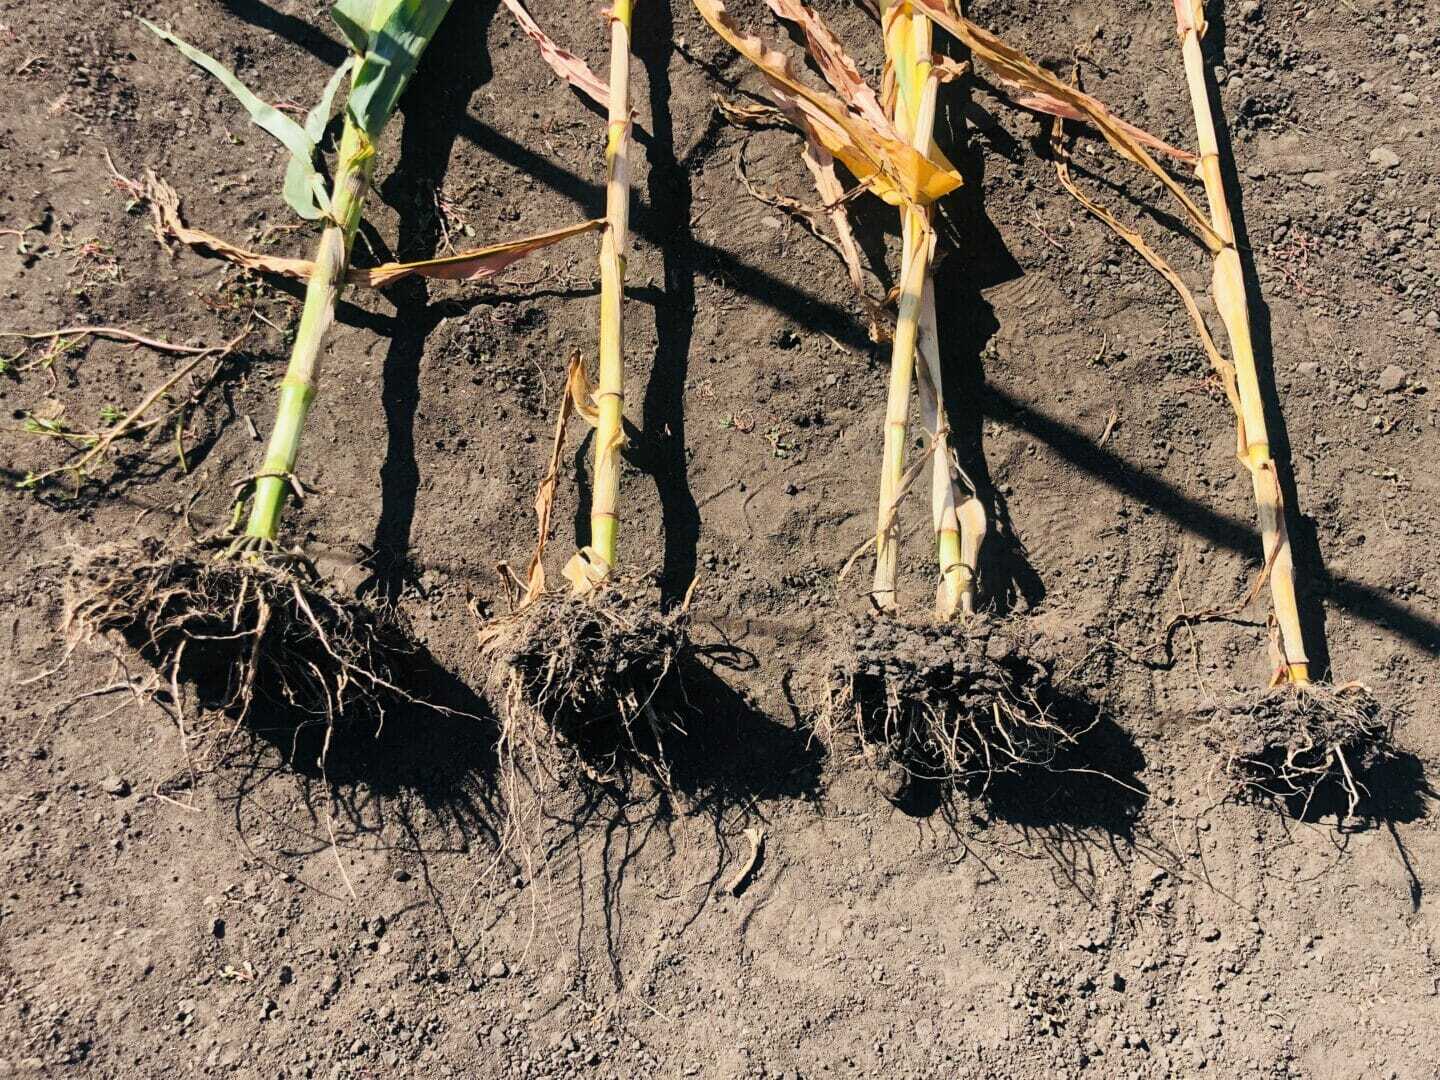
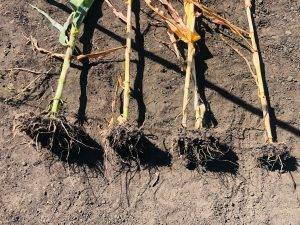
Roots don’t stay shallow because there is water available. Roots stay shallow because they’re blocked from growing deeper.
By and large, most of this variability and early death is coming from the culmination of factors that we’ve discussed at Latham field days, meetings, and in this article. Contrary to the coffee shop discussion,roots don’t stay shallow because there is water available. Roots stay shallow because they’re blocked from growing deeper. Roots don’t grow deep in some “hunt and search” mission. They grow down because of gravity. Furthermore, when plants pollinate well but have sub-par roots, the plant withers early, ears hang, field get spotty, and we notice the crop maturating in spots.
The short answer to this “my field has more weak spots than I thought” boils down to a two basics: roots and compaction. For the most part, compaction could not be avoided. Last fall and this spring simply didn’t allow for the best stewardship practices.
However, I would like to consider what we might have done or what we may be thinking of doing next year in the way of roots (besides a good field ripping). I have spoken often on the strength of later hybrids (relative maturity or RM) versus earlier hybrids. Without question, later is better in most agronomic factors. In general, later RM hybrids genetically have higher yield capabilities, are better in heat, are better in stress, provide more leaf area for sugar production, are typically healthier, have better standing in the fall, are easier to harvest, have higher test weights, etc.
And this year, I would support the idea that later hybrids generally handled some of the compaction issues better. They might have improved root growth/penetration, but I think it is more practical to assume that they just start out with a better toolbox to take the pressures of a season vs the early RM hybrid. I hear the discussion about “wetter corn” and “drying cost” and I won’t argue with each man’s economies. However…
Let’s consider the huge data set against switching to earlier hybrids in late-planting situations (later wins). The cheapest water to remove from a kernel is the 30% to 20% moisture. Here are a few things to consider:
We probably need to rip more acres due to compaction. A deep frost would be on order, as well.
Don’t jump to earlier RM products. The drier harvest will not outweigh the performance.
It’s always about the roots. Roots are the plant’s radiator and the foundation for your next successful crop.
 Benchmarking is the practice of measuring the financial health and performance of your farming operation by comparing it to your performance, and to similar farms. Benchmarking can allow you to improve your financial position by identifying specific actions that can lead to increased profitability and long-term success.