Tissue Sampling Helps Uncover Fertility Issues
 Early season field scouting is essential to detect potential issues like weed and insect pressure, as well as to monitor the effectiveness of your fertility program. One great tool to try and discover fertility problems is a plant tissue analysis. To assure good results from the lab, you must collect the proper part of the plant for the current growth stage of the crop.
For the most effective tissue sample, consider following these four steps:
- Sample multiple areas within a field to better diagnose issues.
- Do not sample too early. Work with your Precision Agronomy Advisors to find the proper timing and placement.
- Try to start with the nutrients that are more likely to be deficient for your specific crop.
- Look at multiple sources of information to make your decisions. Tissue sampling is just one important tool to use.
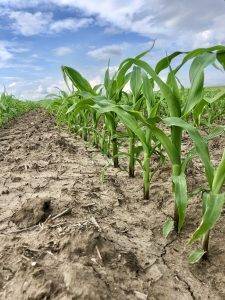
A proper method to collecting early season corn tissue samples is to gather 15 or more plants to complete a single sample. This method is best when the corn is up to 12 inches tall, which is approximately the first three weeks following emergence because much of the nutrients come from the tissues within the seed at this stage.
One example of how a tissue sample can help determine a cause is the case of a purple-colored corn plant. This could be the result of phosphorous deficiency, or it could be because nighttime temperatures were too low.
Plant tissue analysis is a proven diagnostic tool that compares nutritional variances between normal and abnormal zones in the field. No matter the crop, plant tissue analysis is worthwhile to help determine nutrient needs. Don’t make fertilizer decisions based on plant tissue samples alone. To create a nutrient plan, combine tissue sampling with soil test results, records of lime and nutrient applications, cropping history and recent crop protectant applications.
Wait until V2 growth stage, which is three to four weeks after emergence before taking tissue samples of soybeans.
Accurate tissue testing begins with proper sample collection and handling. Collect the proper part of the plant for the correct growth stage of the crop. Also make sure to collect the proper number to have an accurate complete sample. Try to package samples in paper bags. If it will take a while before you get the samples shipped, store samples in a cool environment but do not freeze the sample. In addition, never include roots with the plant samples.
If you’re interested in learning more about how to conduct your own tissue samples, call your Latham Precision Agronomy Advisor. We can help download your Latham Data Forward app, so you can use the no-cost tissue sampling function to collect your samples!